User Guide
How to Register
Go to the Login Page.
At the bottom of the login form, click on the “Register” link.
Fill out the registration form with your details (username, email, password).
Click Submit/Register.

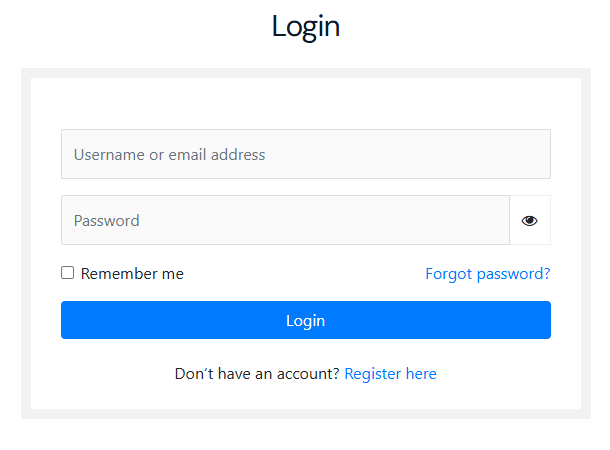
How to Login
Click the “Login” menu from the site header.
Enter your username/email and password.
Click the Login button.
Once logged in, you will be redirected to your Dashboard.
My Profile - User Guide
After logging in, you will be redirected to the My Profile page.
The dashboard includes:
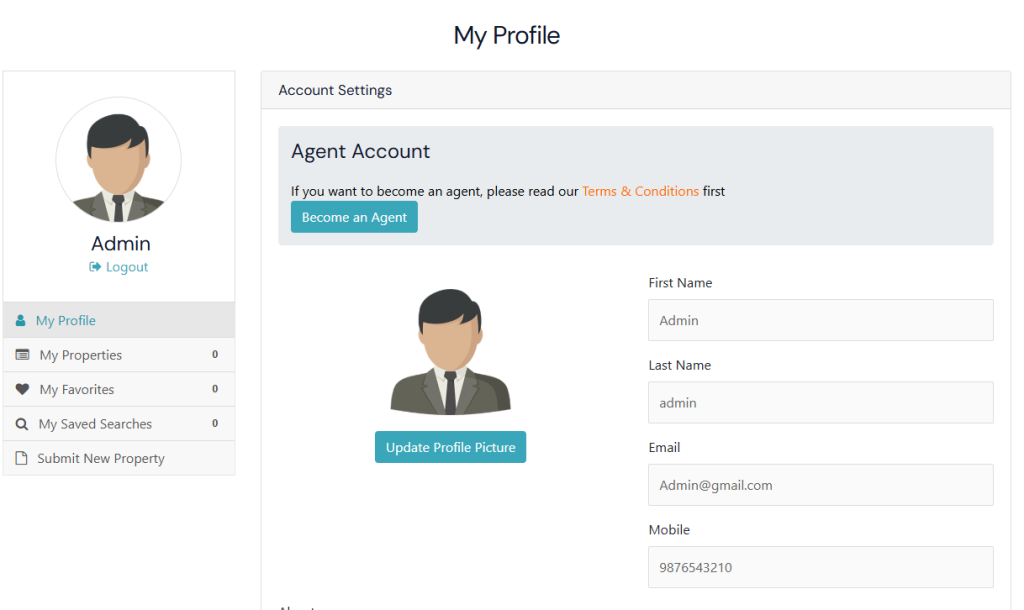
Sidebar Options
1). My Profile
👤 Agent Account
To become an Agent, your account needs Admin approval.
If you want to switch back to a normal account, click on the Remove Agent Account button.
📷 Profile Picture
Click Update Profile Picture to upload or change your photo.
📝 Personal Information
You can update your personal details here:
First Name
Last Name
Email Address
Mobile Number
Any updates will be saved to your account.
↪️ Logout
When you are done, click the Logout button under your profile name on the left menu to securely sign out.
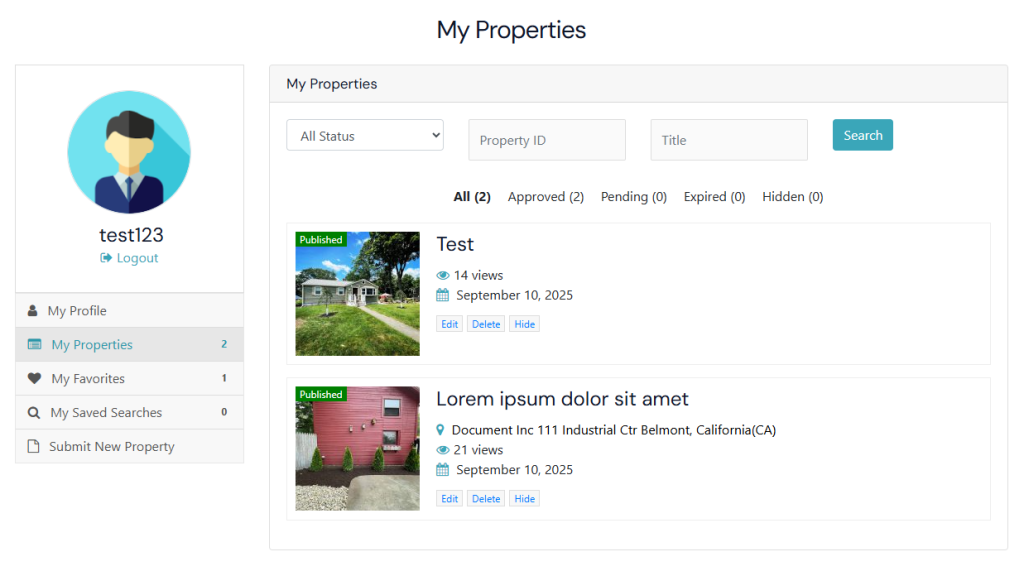
2). My Properties
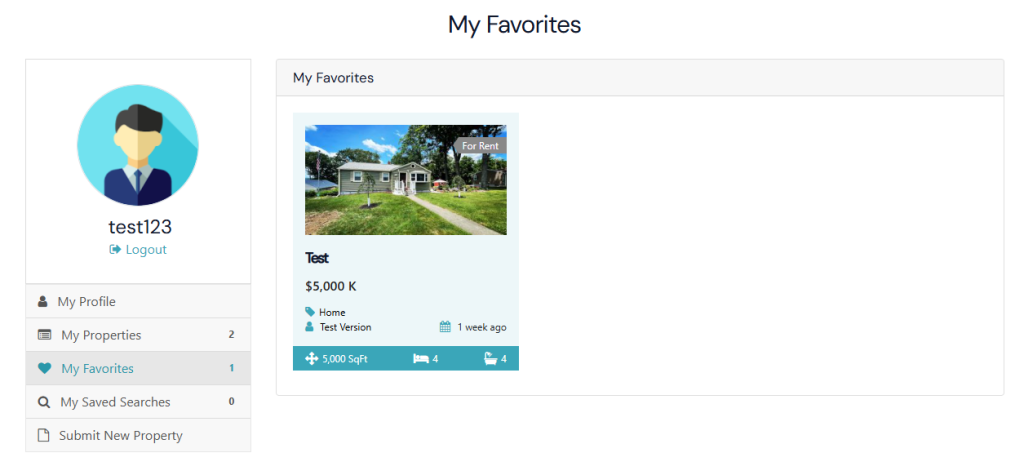
3). My Favorites
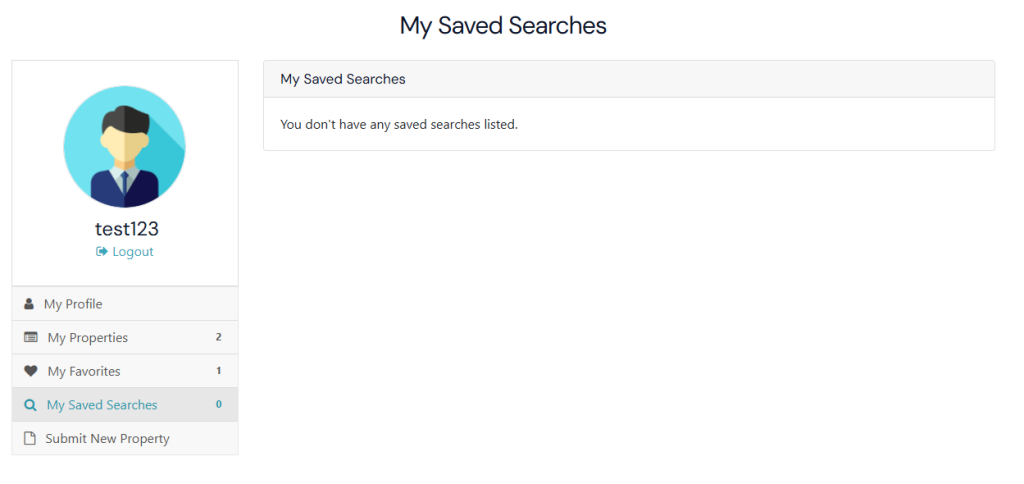
4). My Saved Searches
5). Submit New Property
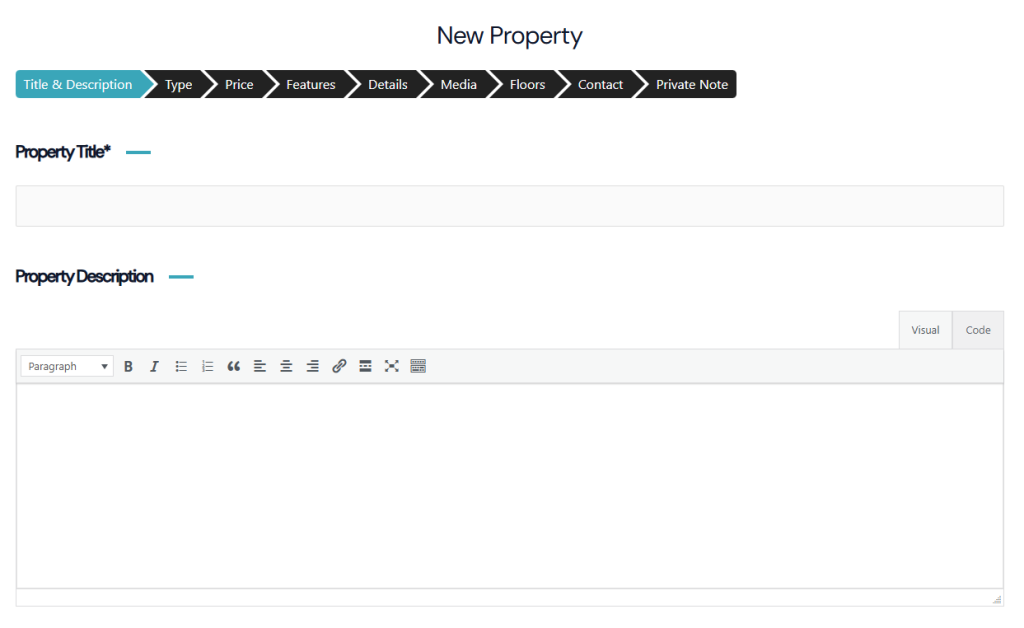
Add New Property – User Guide
This guide will help you add a property step by step using the available fields.
1 . Basic Property Information
- Property Title* → Enter the name/title of your property (e.g., “Luxury 2 BHK Apartment in Downtown”).
- Property Description → Write a detailed description of the property including features, highlights, and amenities.
2 . Property Type & Status
- Property Type* → Choose from:
- Apartment
- Home
- Villa
- Status → Select if the property is For Rent or For Sale.
- Label → Add a label if needed (e.g., “Hot Offer,” “New Listing”).
3 . Property Price
- Price* → Enter the price in USD (Example: 12345.05).
- Unit → Specify the unit (if applicable).
- Before Price Label → Text shown before the price (e.g., Start From).
- After Price Label → Text shown after the price (e.g., Per Month).
- Price on Call → Select this option if you do not want to display a price publicly.
4 . Property Details
Fill in the detailed specifications of the property:
- Size (SqFt) → Total covered area.
- Land Area (SqFt) → Total land size.
- Rooms → Number of rooms.
- Bedrooms → Number of bedrooms.
- Bathrooms → Number of bathrooms.
- Garages → Number of garages.
- Garage Size (SqFt) → Size of garage.
- Year Built → Construction year.
- Property ID → Unique ID (auto-generated or assigned manually).
5 . Property Address
- Address* → Enter the complete street address.
- Country* → Select the country.
- Province/State* → Select state or province.
- City/Town* → Enter the city or town.
- Neighborhood → Mention the neighborhood/locality.
- Postal Code / Zip → Enter postal code.
6 . Additional Details
- Add extra details if needed in the format:
- Title → (e.g., “Flooring Type”)
- Value → (e.g., “Wooden Flooring”)
- Title → (e.g., “Flooring Type”)
You can add multiple custom details using the Add New option.
7 . Property Media
- Photo Gallery → Upload images of the property. You can drag & drop or browse to select.
- File Attachments → Upload documents (Allowed formats: PDF, TXT, DOC, DOCX).
- Video URL → Paste a link from YouTube or Vimeo.
- Image 360 → Upload 360° images for a virtual tour.
8 . Floor Plans
- Choose Enable if you want to add floor plans, otherwise leave it as Disable.
9 . Contact Information
- Select what to show in the contact box:
- My Profile Information → Displays your registered profile details.
- My Profile Information → Displays your registered profile details.
Other Contact → Add alternative contact details for this prop
10 . Private Note
- You can create a Private Note about the property.
- This note will not be visible to the public and is only for your internal reference.
Final Step:
After filling in all details, click on Submit/Save to your property listing.
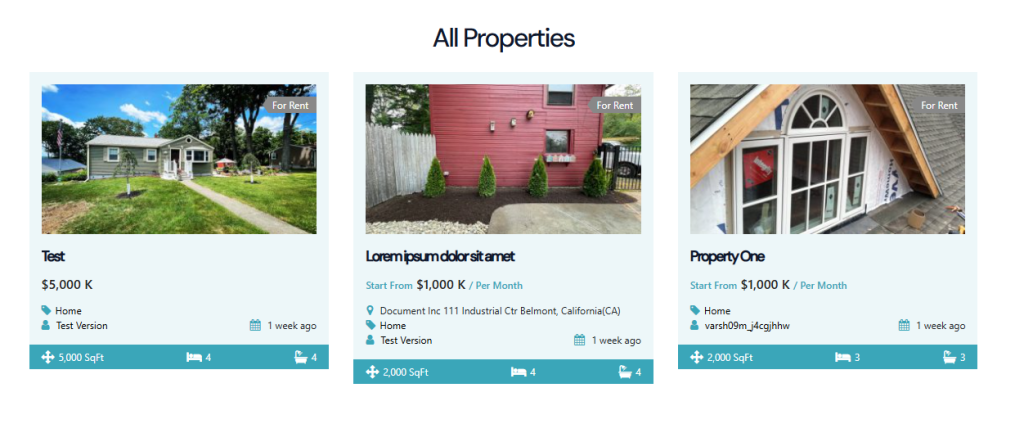
All Properties
Welcome to the All Properties page. Here, you will find a complete list of properties added by all registered users on our platform.
- Every property listed here has been submitted by different users, making it easy to explore multiple options in one place.
- You can browse through apartments, homes, villas, and other property types with details such as price, size, location, and features.
- Use the filters and search options to quickly find the properties that match your needs.
Once you find a property you are interested in:
- Click on the property to view full details on the Property Detail Page.
- At the bottom of the page, you will see the Inquiry Form.
- Fill in your Name, Email, Phone Number, and Message to contact the property owner or agent directly.
👉 Your inquiry will be sent to the respective property owner, and they will respond to you with more details.